
Introduction
Localizing your iOS app is crucial for expanding its reach and increasing user engagement. By offering your app in multiple languages, you make it accessible to a global audience, enhancing its marketability and potential for higher downloads and revenue. Localization also demonstrates a commitment to user inclusivity, improves user experience, and fosters a stronger connection with international users, ultimately boosting your app’s chances of success in a competitive app market.
What is a String Catalog?
Before String Catalog, app localization could be very challenging, especially for more complex apps. With the arrival of Xcode 15, Apple has made this process much easier for developers.
In short, a String Catalog is a file. Its extension is “.xcstrings”, and when you create a new file, the default name will be “Localizable”.
String Catalog helps us to easily manage all of our strings in one place.
This new thing that Apple presented to us at WWDC23 is amazing, let’s see why.
App
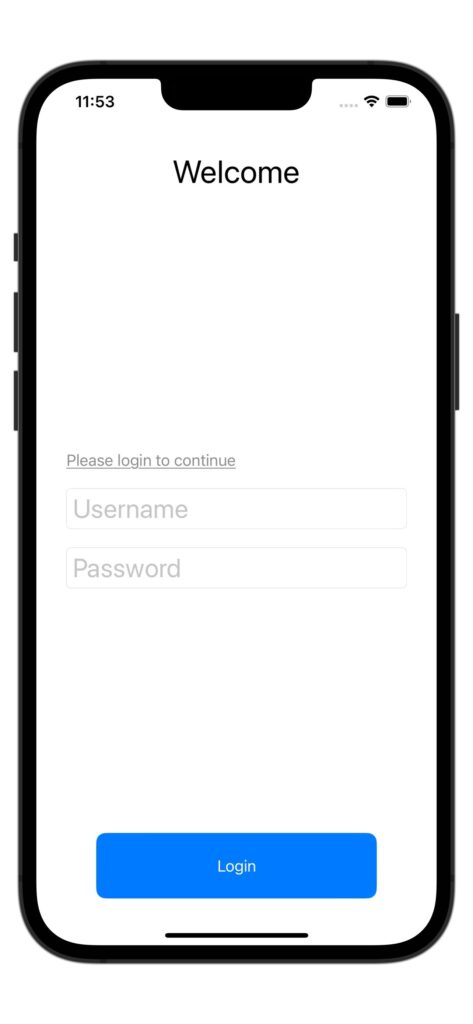
This is a simple application that we will localize in the next few steps with the help of String Catalog. It currently consists only of the login screen, on which there are a couple of strings in English. You will see how easily we can translate it into German.
Code
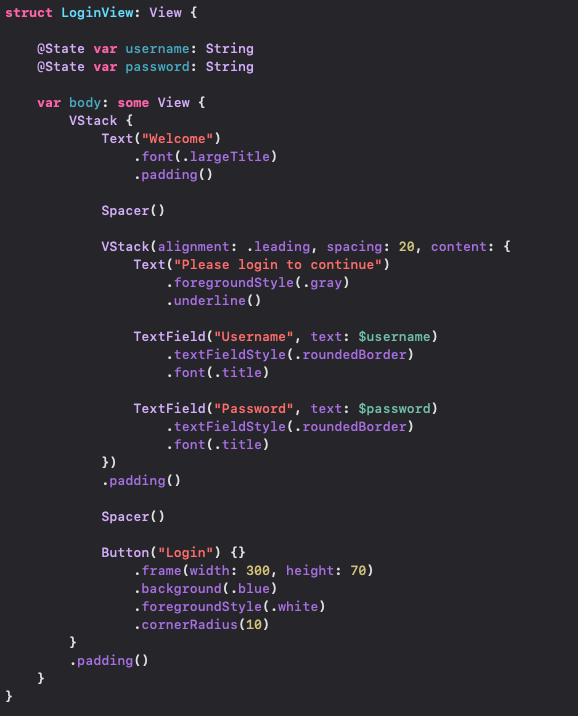
Let’s jump into code. I have been keeping it short and simple.
This below is the code behind our simple login screen. I have created a new Xcode project named “StringCatalog”, using SwiftUI.
Localization
Let’s right-click on the root folder of our application, and then on New file. Then, type “string” in the filter, and Xcode will offer us its new feature:
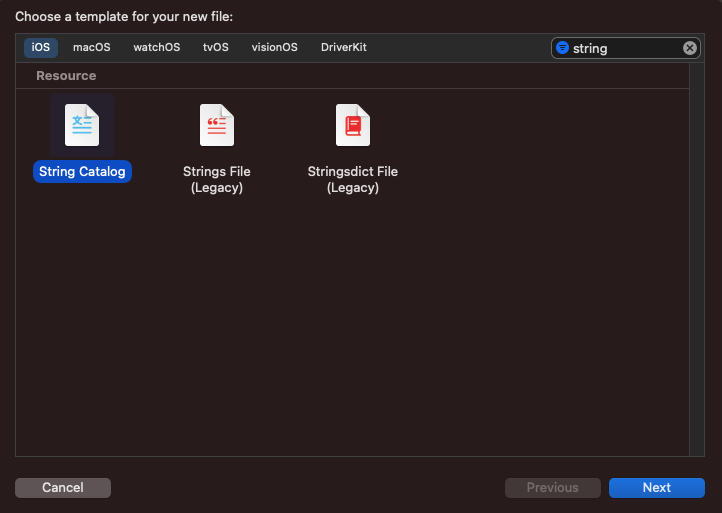
We will select String Catalog and then press Next and then Create.
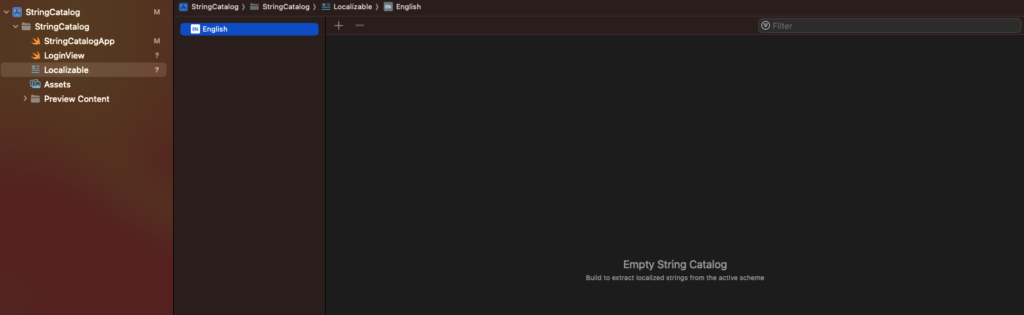
Okay, our catalog is here. But Xcode says it’s empty!? Don’t worry, to fill it out, we only need to launch our application. Let’s do it and see what happens.
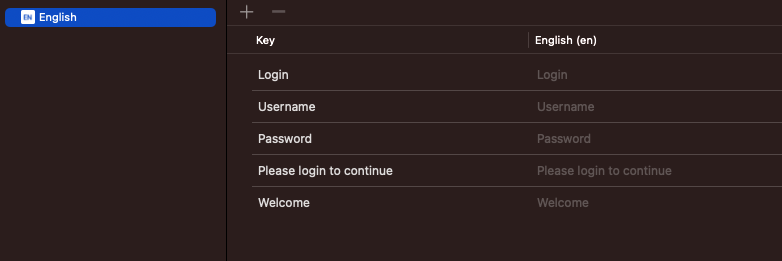
Yes, our table is now populated and things are slowly starting to make sense.
Now let’s explain how this works in the background.
In Swift, Localizable Strings consist of four components. These are key, value, table, and comment.
Key – it is a unique identifier for all our strings. The key can be equal to the string itself, but we can also choose another format. For example, As you can see in the table, String Catalog took the string itself as key.
Value – is what we see in the picture above in the second column. As the word itself says, it is the default string value for a specific language.
Comment – Comment is optional and allows us to write some description of our string. It can be useful for others to understand more easily what it is about.
Table – is where we want our string to be saved. We can have a bunch of them, depending on our use case.
Honestly, I don’t like the fact that our keys and values look the same. We can easily change that, one way is to store our strings in a separate struct, and then replace our hardcoded strings in the body with them. Let’s quickly do this.

Our body will now look a bit cleaner:

just like our catalog. However, this change will not happen by itself. We have to run the project first.

I didn’t have too much inspiration for the keys, but you will agree that this looks a little nicer and more understandable now.
Let’s now return to our main task and translate this screen into German in a few steps.
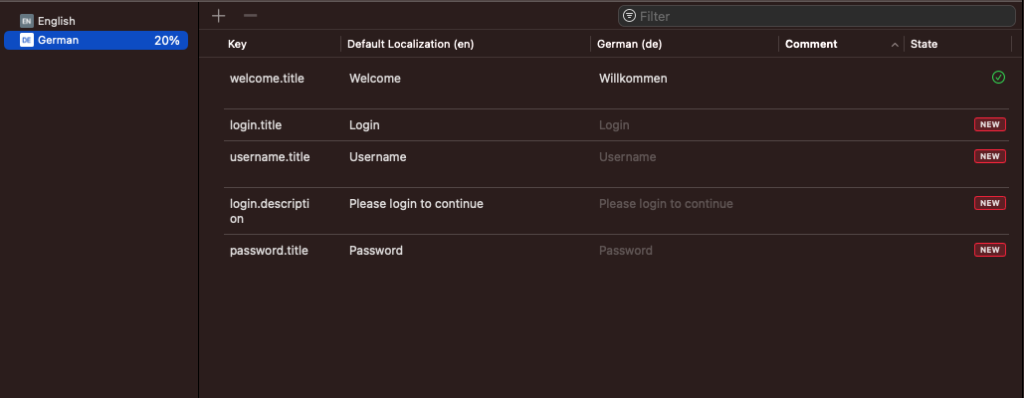
In the string catalog, in the languages section, press the plus button and then select the German language.
The new language will be added to the list, and 0% will be written next to it, which means that we have not translated any strings. Our application currently has five of them, so if we translate one of them, next to the German language, it will say 20%. This is super useful to know if there are strings that haven’t been translated yet.
Also, in the State column we will see a green checkmark next to translated and a red “New” next to untranslated strings. These red ones will appear every time we add a new string in the code and then run it.
Now, let’s fill in the other fields in the table of our catalog and then change the phone language. We can do this in the “Settings” application if we tap on “General”, then “Language & Region”, and select the desired language.
Then open our application and… the magic is here:
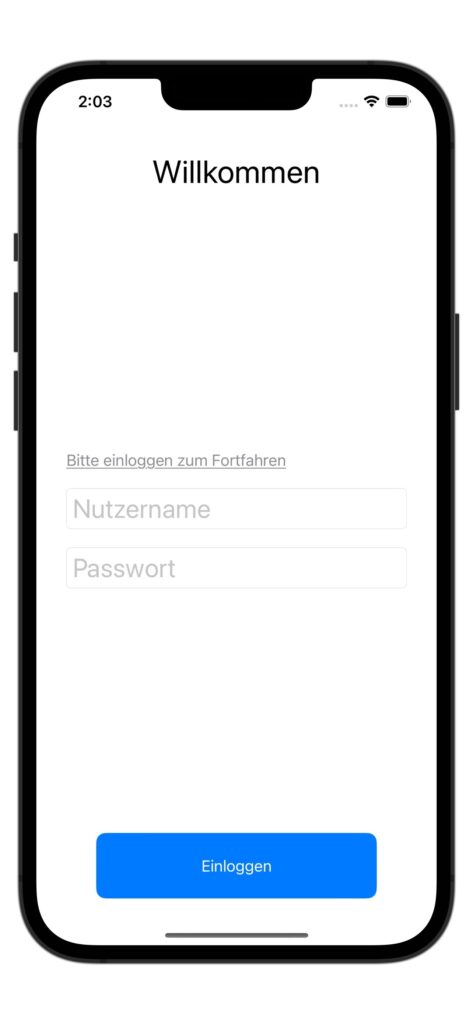
Our simple application is completely translated into German.
This was very easy, wasn’t it?
Important notes
All views that have a localizedStringKey initializer will be added to the catalog when you run the app, e.g.:
- Text(“Ok”)
- Button(“Ok”) { }
- let okText = String(localized: “Ok”)
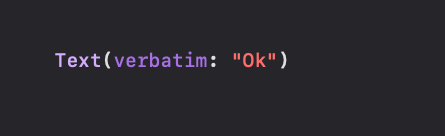
And so on… So be careful. If we don’t want to translate our Text view with an “Ok” string, because maybe we want to keep the same text in all languages, we need to create it using the verbatim parameter, like this:
If you want to delete the language, you will need to switch to the project settings’s Info tab and hit the – button.
In case you want to learn more, you can visit:
– Apple’s official documentation
– WWDC23 video
Thanks for reading 🙂
Happy coding!
Read also this: Swift Guide: Making a Rotatable Knob Control – Step-by-Step