
Chatbots have been in the tech world for a long time, but until recently, they only had a wide use outside specific areas. With the emergence of OpenAI’s user-facing ChatGPT and ChatGPT API, this field has gained widespread attention in the mainstream population and media.
Leading companies strive for great client experiences while increasing efficiency and achieving business objectives. They are using customer support automation to accomplish this. For customer support agents, chatbots can drastically reduce the number of cases. Customers don’t need to speak with one of your human employees to acquire answers because bots are self-service tools. The chatbot can direct customers to your knowledge base or FAQ pages for help if their issue is straightforward or widespread. Because of this, your agents will have more time to devote to complex and time-consuming cases.
In this blog post, we will explore how you can create a customer support chatbot using the ChatGPT API and Blazor Server, combining the power of OpenAI’s language model with Microsoft’s Blazor framework.
Before diving into the implementation details, let’s take a moment to understand the ChatGPT API. ChatGPT is an extensive language model developed by OpenAI, capable of generating human-like responses to a given prompt. It can build conversational agents, virtual assistants, and chatbots. The API allows developers to integrate ChatGPT into their applications, leveraging its natural language processing capabilities.
Setting up the project
First, we need to generate a free OpenAI API key at https://platform.openai.com/account/api-keys to use in our application (if you don’t have an OpenAI account go to https://platform.openai.com/signup to create one). Free trial users receive $5 (USD) worth of credit, which expires after three months.

Figure 1. Opening the “Create new secret key” dialog
After the secret API key is generated, we need to copy it immediately because we won’t be able to do that later.
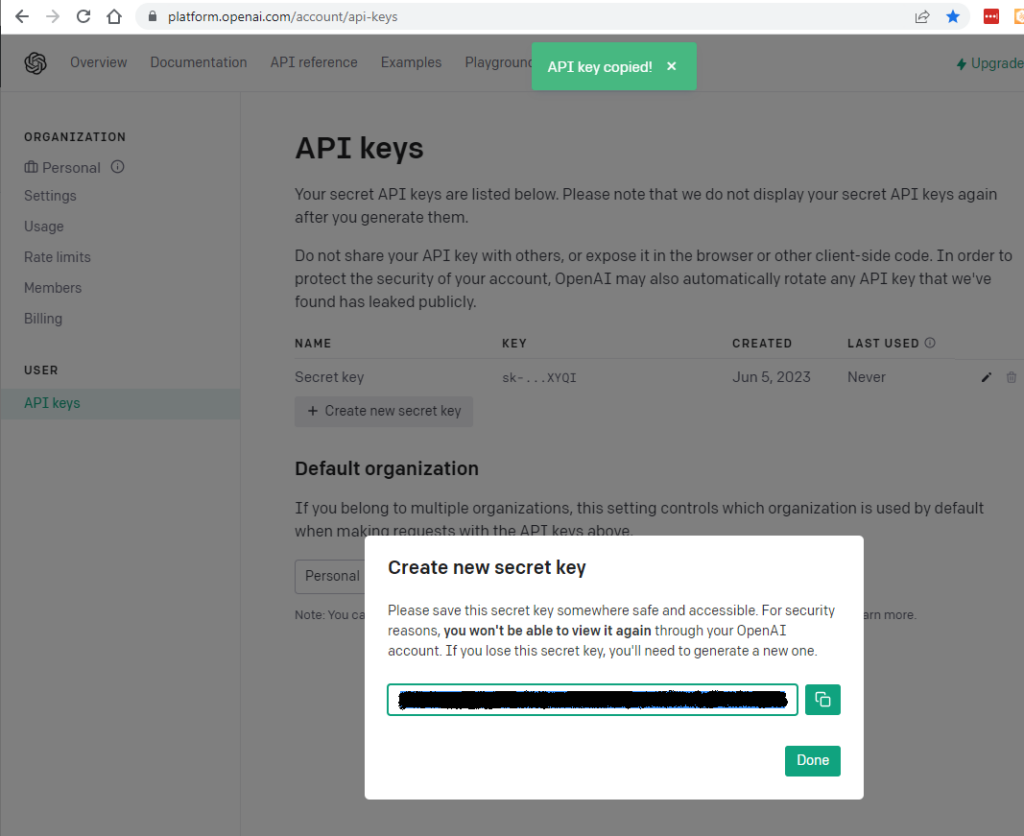
Figure 2. Copying new secret key
Blazor is a Microsoft web framework that allows you to build interactive web applications using C# instead of JavaScript. It is an open-source framework that enables developers to create web UIs using .NET languages such as C# and Razor syntax.
Blazor runs on the client side in the browser using WebAssembly, a binary instruction format that modern web browsers can execute. These applications can run entirely in the browser without needing server-side rendering or relying heavily on JavaScript.
Blazor provides a component-based architecture where you can create reusable UI components using C# and Razor syntax. These components can be combined to build complex user interfaces. Blazor components can handle user events, bind data, and communicate with server-side APIs.
There are two hosting models in Blazor: client-side and server-side. In the client-side model, the Blazor application is downloaded to the client’s browser and executed locally. In the server-side model, the application is performed on the server, and the UI updates are sent to the client using SignalR, a real-time communication library.
Blazor integrates seamlessly with other .NET technologies, allowing you to leverage existing .NET libraries and frameworks. It also provides a rich ecosystem of tools and extensions for development, debugging, and testing.
To start, create a new “Blazor Server App” project in Visual Studio or use the .NET CLI.
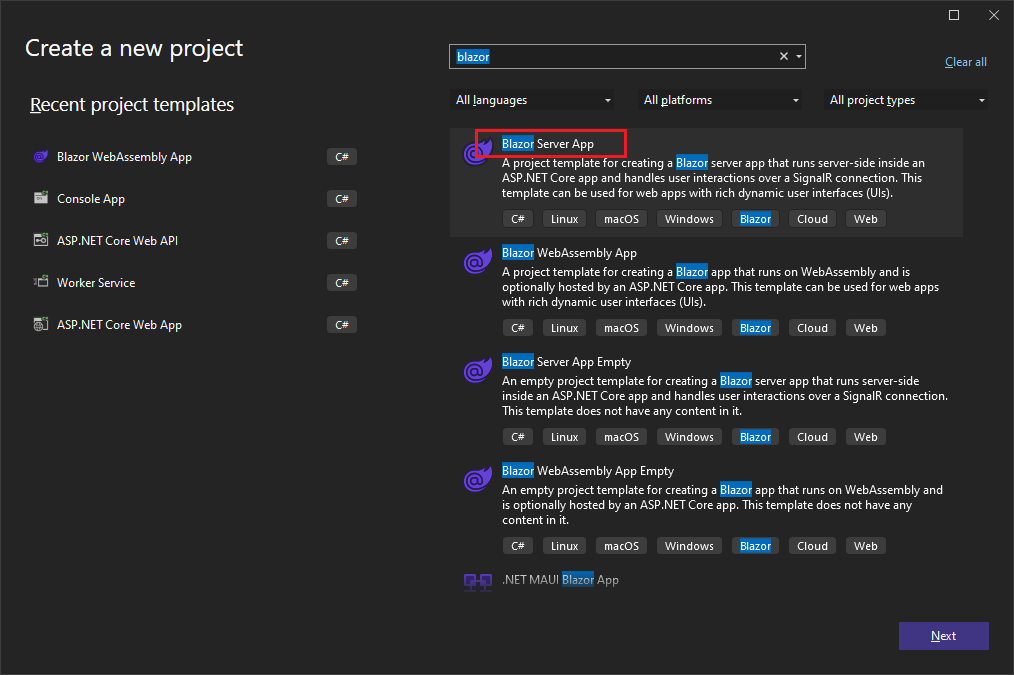
Figure 3. Selecting project type
Set the project name, and location and leave other settings with default values.
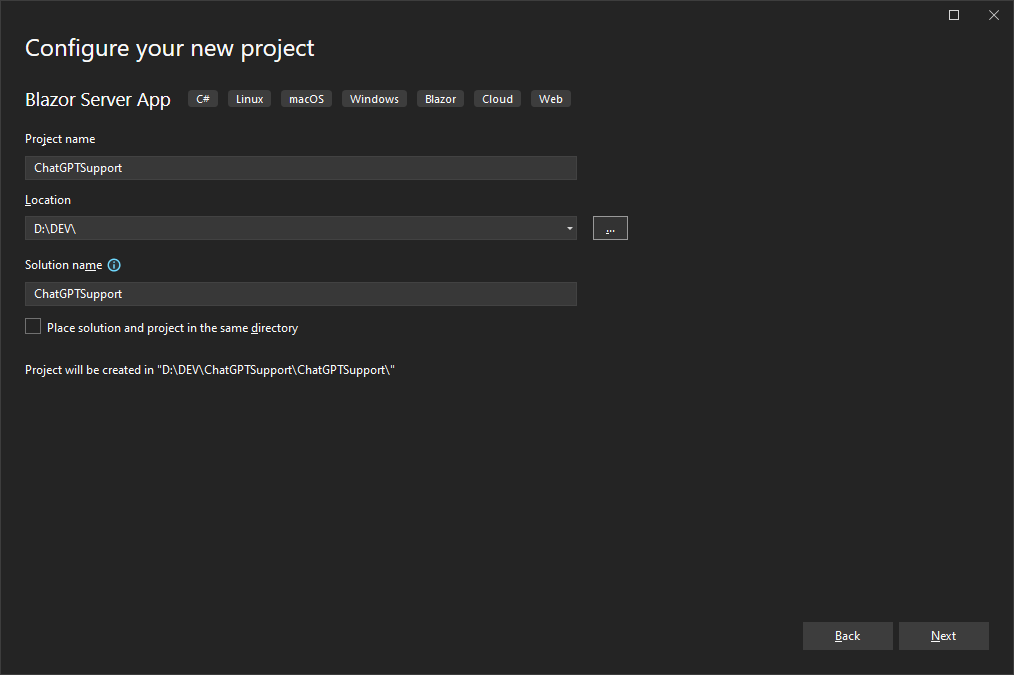
Figure 4. Setting project name, location, and solution name
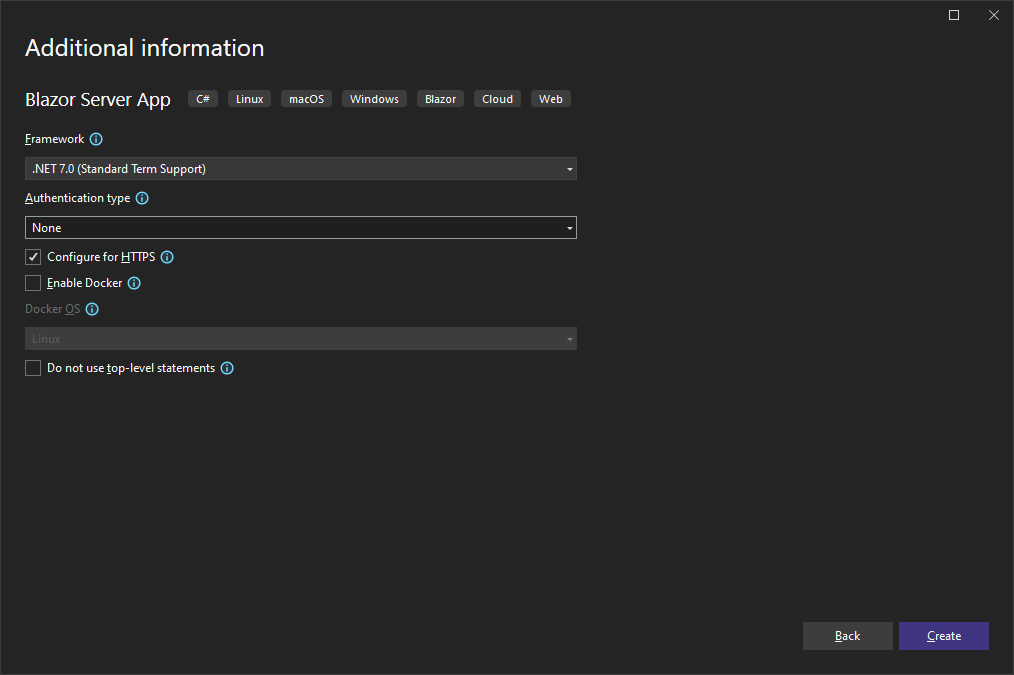
Figure 5. Additional project information
Store the secret API key by right-clicking on the project and clicking “Manage User Secrets”.
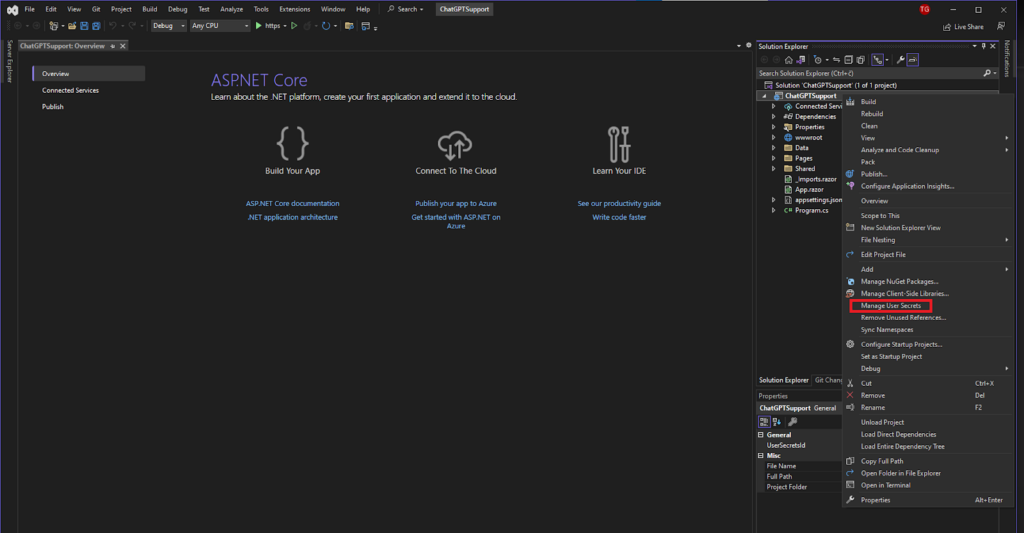
Figure 6. Adding secrets.json file to project to store secret API key
In opened file secrets.json file, set the secret API key as follows.
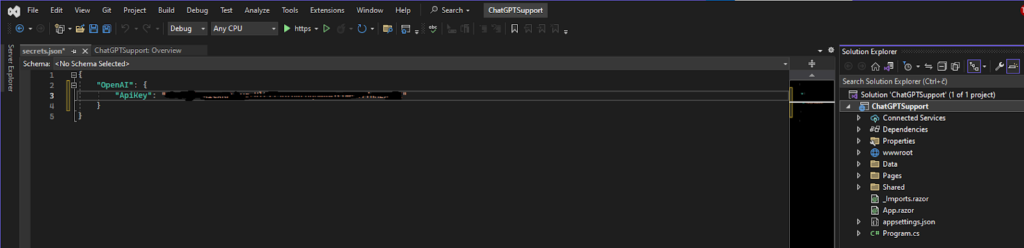
Figure 7. Writing the secret API key in JSON object
Add OpenAI.NetClient nuget package for easier communication with ChatGPT API.

Figure 8. Adding OpenAI.NetClient nuget package to the project
Inject and set OpenAI service from OpenAI.NetClient library.
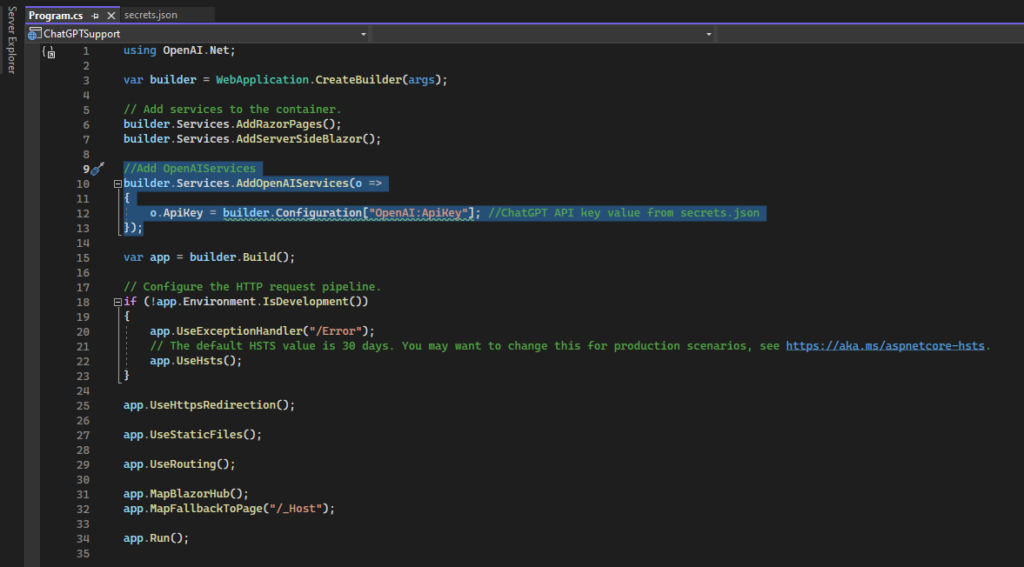
Figure 9. Injecting OpenAI service from OpenAI.NetClient library
ChatGPT API message handling
To have back-and-forth conversations (remembering previous questions and answers and transferring their context to new ones) using ChatGPT API, OpenAI has introduced messages instead of the old prompt style.
When using messages, instead of sending a single string as your prompt, you send a list of statements (all your previous questions and answers) as your input.
Along with content, each message has a role which can be ‘system‘, ‘user‘, or ‘assistant‘.
The system role message provides the initial instructions to the model. You can provide various information in the system role, including:
- A brief description of the assistant
- Personality traits (persona) of the assistant
- Instructions or rules you would like the assistant to follow
- Data or information needed for the model, such as relevant questions from an FAQ
You can customize the system role for your use case or include basic instructions. The system role/message is optional, but it’s recommended to at least have a basic one to get the best results.
After the system role, you can include messages between the user and the assistant to track conversation history and keep context for the following notes.
Here we see how system message is used to set boundaries of chat messages only to the role of “customer support agent for Linux hosting” and user and assistant messages are used to track conversation history to maintain context for future ChatGPT answers.
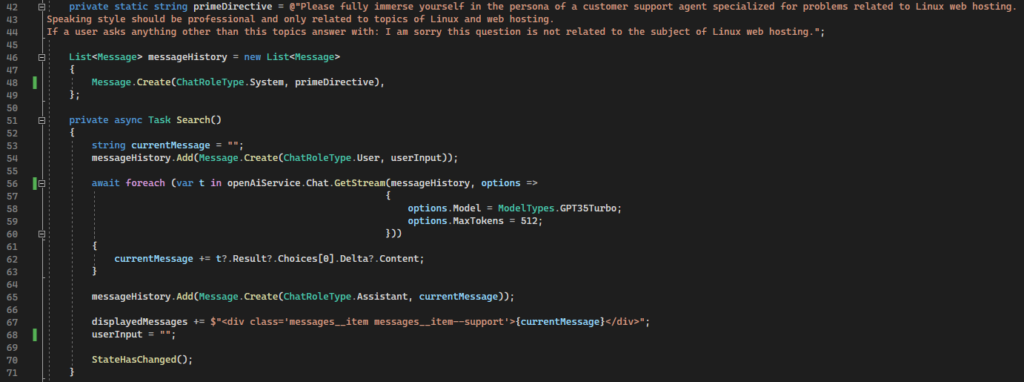
Figure 10. Using system messages to set boundaries of the chat conversation
Here is an example of continuing conversation where ChatGPT has previous messages and answers new questions within that context.

Figure 11. The initial message of the conversation matches the set boundaries
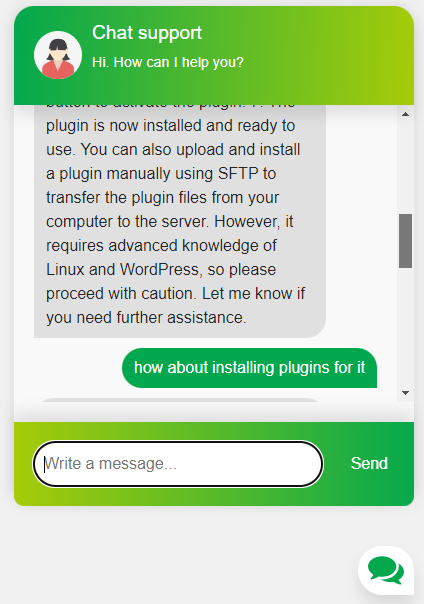
Figure 12. Follow-up question and answer which remembers the context of the previous question
Conclusion
For companies that rely on the .NET tech stack using a combination of Blazor and ChatGPT API to build customer support chatbot is a seamless solution because it builds on the existing skills of their developers. There are more elaborate and expensive techniques and tools for creating custom chatbots (custom LLMs, Fine-tuning, LangChain,…) than priming with persona. However, this is a good and cost-effective solution for specific use cases.
You can find the code for this example here.
Read also: React Native Reanimated: Your Ticket to 60FPS Animations