

Are you interested in using React Native to build mobile applications? If yes, navigation is a crucial aspect of any application, allowing users to move seamlessly between screens and views.
React Native provides various navigation libraries with powerful features, including stack navigation, tab navigation, drawer navigation, and more, which can help you create smooth and intuitive navigation experiences for your app users. Choosing React Native for navigation offers the advantage of building a consistent user experience across multiple platforms, and it’s also easy to integrate with other React Native components and libraries.
In an upcoming blog post, we will discuss the various types of navigation available in React Native, providing examples on “React Navigation” library of how to implement them in your app . This post will be helpful for both seasoned developers and beginners looking to improve their mobile app development skills using React Native.
Stack Navigator
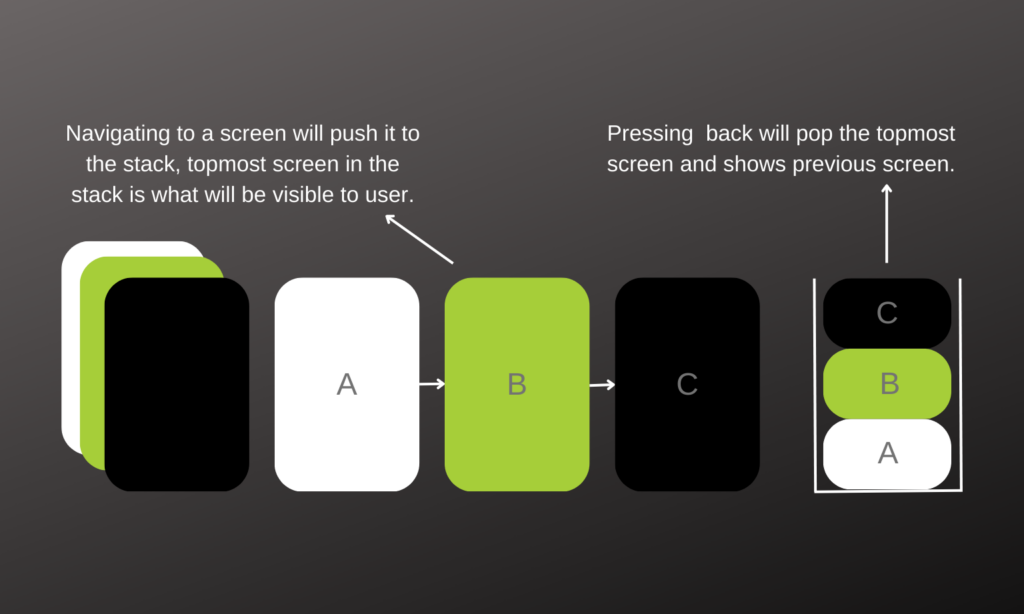
Stack Navigation is a widely used navigation component in React Native that enables you to create a navigation system based on a stack within your application. This system organizes screens in order and facilitates navigation through a back button or gesture. The Stack Navigator manages the navigation stack, which comprises screens arranged in a particular order. The top of the stack displays the most recently accessed screen, and previous screens are pushed down one level. The Stack Navigator offers a range of methods that allow you to navigate between screens, add or remove screens from the stack, and customize the look and feel of the navigation bar. To use the Stack Navigator, you must first import it from the React Navigation library and then define a set of routes corresponding to your application’s screens. Each route is a key-value pair, with the key being the screen’s name and the value being a component that defines the screen’s UI and functionality. For instance, if your application contains two screens, namely Home and Details, you can define the routes in the following manner:
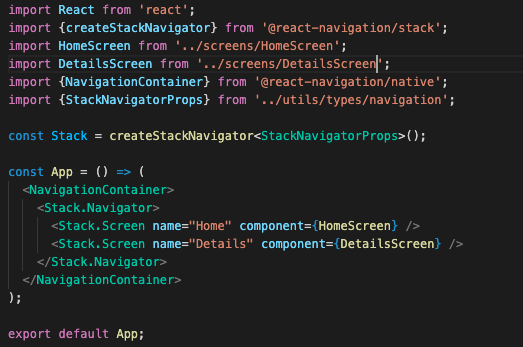
In this example, we use the “React navigation” library to import the createStackNavigator function, which allows us to define two screens, HomeScreen and DetailsScreen. Using the createStackNavigator process, we create a Stack object that we then use to describe a stack navigator inside the NavigationContainer component. The Stack.Navigator component defines the navigation stack and contains stack. Screen components that correspond to the screens in our app. Each Stack.Screen component has a name and a component that defines the screen’s UI and behavior. Whenever a user navigates to a new screen, the Stack Navigator adds the new screen to the top of the stack while pushing down the previous screen one level. Users can return to the last screen using the back button or gesture. In addition, the Stack Navigator provides several options to customize the navigation bar’s appearance and behavior, such as setting the screen’s title, defining the header buttons, or specifying the transition animation for the screen.
Bottom Tab Navigator
Bottom Tab Navigation creates a set of tabs at the bottom of your screen. These tabs are buttons that your users can tap on to switch between different screens, stacks or views in your app.
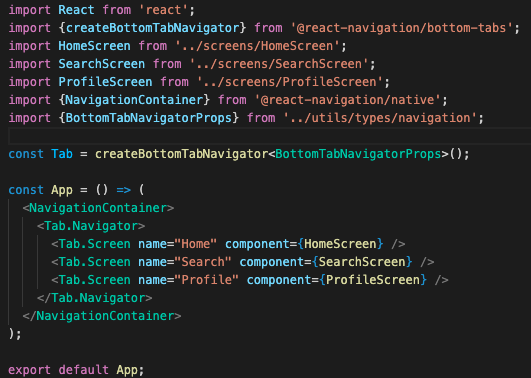
If you want to implement Bottom Tab Navigation into your app, you’ll need to identify the specific screens you want to be accessible through the tab bar. One way to do this is by setting the “routes” with each route representing a screen within your app. Once you’ve identified your routes, you can utilize the createBottomTabNavigator function from the @react-navigation/bottom-tabs library to establish the tab bar itself. This function takes your defined routes and builds a set of tabs that correspond to each screen. Each tab is constructed using the Tab. Screen component, which allows you to specify the name of the screen that will be displayed when the user taps on that particular tab.
Additionally, you have the option to customize the appearance of each tab, such as by adding an icon or label or modifying the tab’s color depending on whether it’s active or inactive. When the user taps on a tab, the corresponding screen will appear, and the other screens will be hidden. The Bottom Tab Navigation component also offers many customization options, enabling you to tailor the behavior of the tab bar to your specifications.
Here is an example of a Bottom Tab Navigator:
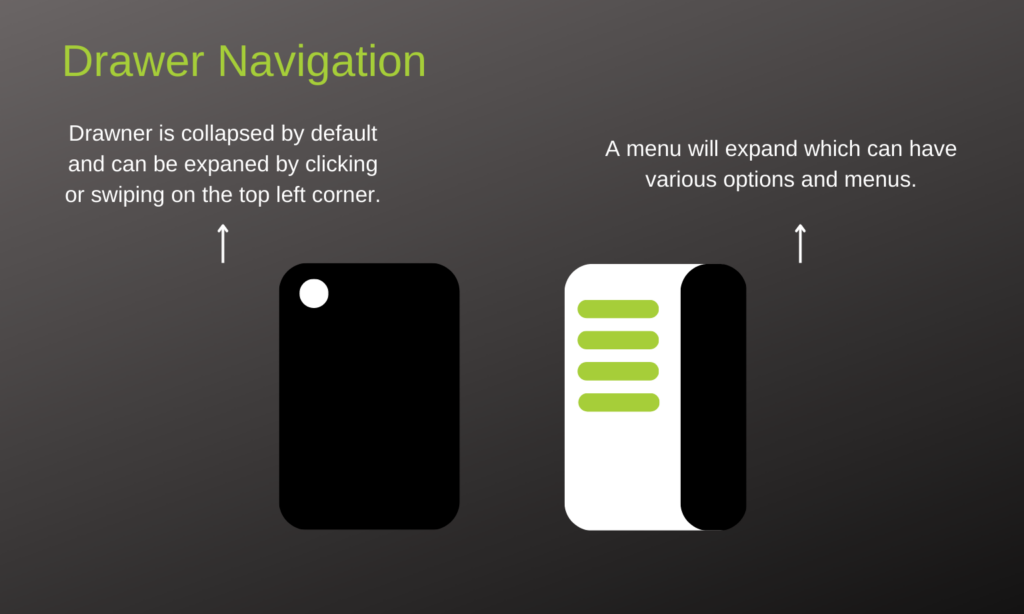
Drawer Navigator
Drawer Navigator is a type of navigation component that allows you to create a menu that slides out from the side of your app when a user swipes or taps a button. This navigation also uses a similar implementation logic as the previously mentioned Stack and Bottom Tab navigation.
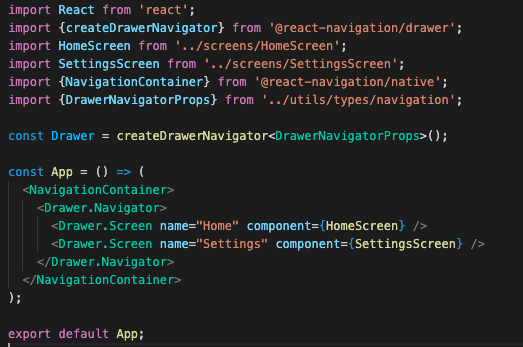
You can create a Drawer Navigator using the createDrawerNavigator function from the @react-navigation/drawer library. This function takes your defined routes as input and returns a component that can be used to render the navigation menu.
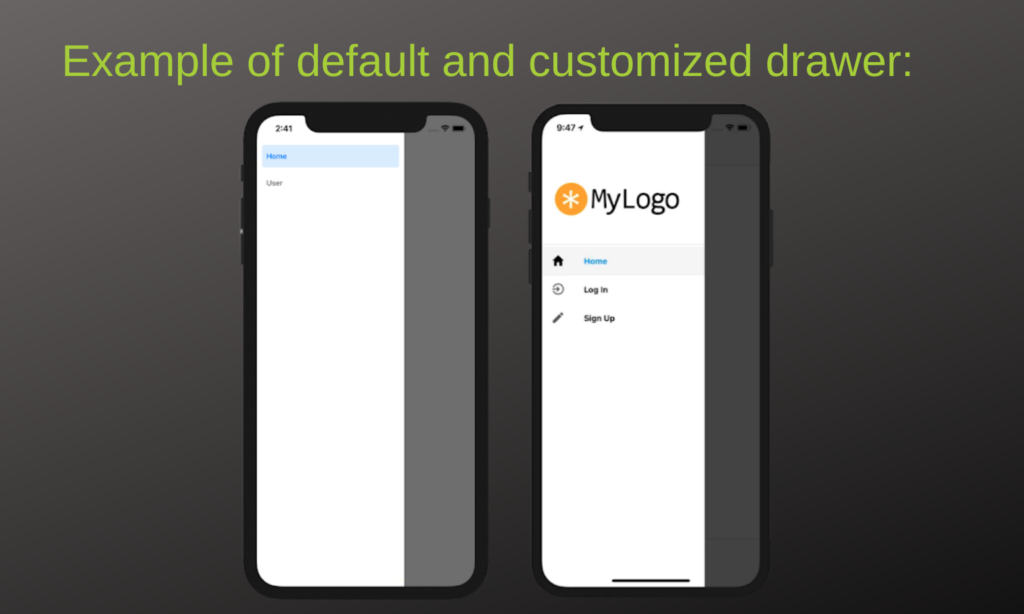
Example of Drawer Navigator implementation:
Customizing your Drawer Navigator is an excellent way to make your app stand out and provide a unique user experience. Adding a custom header is one everyday use case for customizing the Drawer Navigator. By default, the Drawer Navigator includes a header that displays the name of the current screen and a button to toggle the drawer.
Creating a seamless and intuitive navigation experience is crucial in building mobile apps. React Native’s navigation libraries, such as the Stack Navigator, Bottom Tab Navigation, and Drawer Navigator, provide developers with a wide range of features and options to customize the navigation experience for their users. By leveraging these powerful and flexible tools, developers can ensure a consistent user experience across multiple platforms and easily integrate with other React Native components and libraries. Armed with the knowledge gained in this article, you’re now equipped to start building mobile apps with better navigation experiences using React Native.